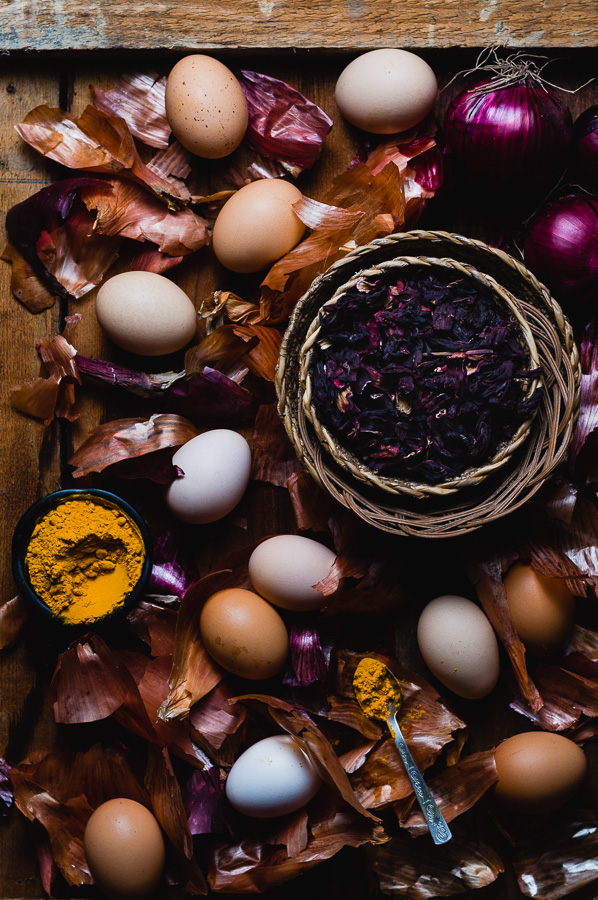
If you look around your kitchen or pantry, you’ll see that you already have a few ingredients that you can use to dye your Easter eggs naturally. Take a look at your spice shelf: those tiny jars of yellow turmeric powder or intensely red paprika are luring you with their vibrant colors. Black tea, rooibos or hibiscus may intrigue you from your tea box while purple or red onions, red cabbage and bottle of cheap wine are smiling to you from your pantry.
Yes, my dear, these spices, vegetables, and liquids can all be used for dyeing your Easter eggs!
I like to dye Easter eggs in a natural way for two main reasons: first, these natural colors are completely safe for our health and environment, and second, with natural pigments, you always have an element of surprise: you can’t be 100% sure what color you’ll get exactly. And this is where magic begins.
This is the third year I’ve been trying to dye Easter eggs this way and I like it so much that I decided to share some of my favorite natural dyes that I like to use for this DIY project!
Besides that, I’m trying to reduce food waste in my kitchen. Easter eggs dyed with artificial coloring were always being used only as a decoration on the Easter table at my family’s house. After Easter, they were thrown away.
Well, NOT ANYMORE.
So, I really hope that you’re also going to find this method of natural dyeing Easter eggs interesting enough to try it together with your family!
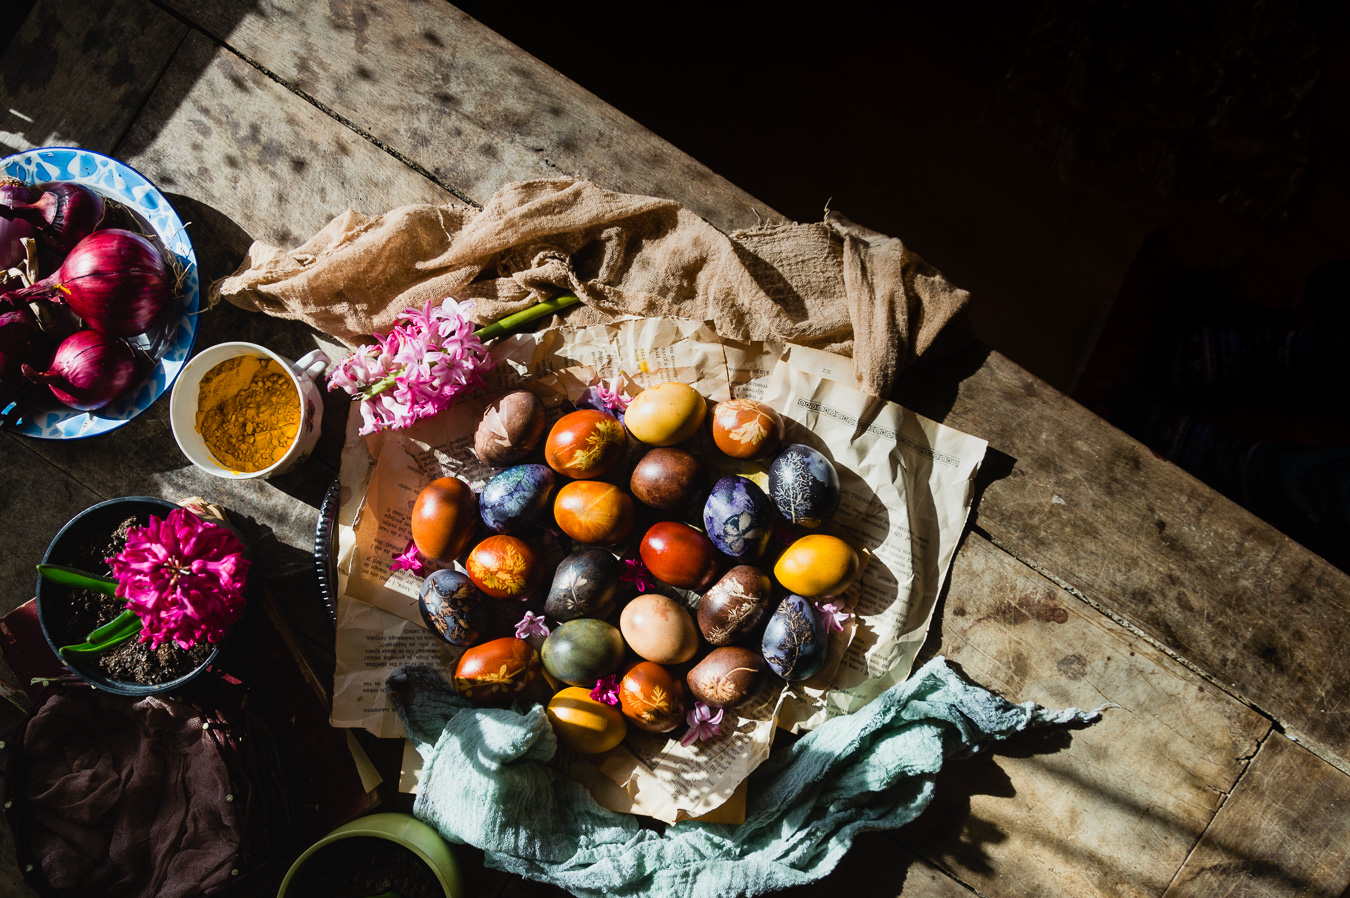
For this Easter, I decided to dye eggs with 4 different plant materials: turmeric, onion skins, red wine, and hibiscus tea.
Why do we dye eggs for Easter
If you are curious by nature as I am, then you must have wondered at least once where does this tradition of dyeing eggs for Easter came from. Although dyed eggs are traditionally associated with Easter, the most important Christian holiday, history shows that people dyed eggs long before the appearance of Christianity. In fact, in many cultures, especially pagan, eggs were a symbol of rebirth and fertility, the arrival of spring and the nature awakening.
Some historical sources state that early Christians who were living in the area of ancient Mesopotamia were the first to dye eggs in memory of Jesus Christ. The eggs were painted red to symbolize the blood of Christ.
Today, the selection of Easter eggs is bigger than ever: from wooden ones decorated with pigeon motifs, rabbits or geometric ornaments, to the boiled chicken eggs or chocolate eggs that have been very popular in recent years.
At our home, before those little coloring tablets became so popular, we were always dyeing Easter eggs with onion skins. In order to get an interesting pattern on eggs, we would collect some interesting spring herbs, which we would then put on a fresh egg, wrap it in a piece of gauze or clean nylon socks and boil them together with onion skins.
Those beautiful red Easter eggs would never disappoint us. They were always looking so pretty, but in the meantime, I’ve discovered some other natural dyes like turmeric powder, red wine, and hibiscus tea so those will be colors I’ll use for today’s Easter DIY.
Two methods of natural dyeing
Cold method – This method includes boiling eggs separately and then dipping them in previously prepared natural dye. This can be anywhere from 30 minutes to several hours or overnight. This will probably result in more gentle, pastel tones.
Boiling method – In the second method, you’ll boil fresh eggs together with the coloring material and cook for as long as it takes for the eggs to become hard-boiled and the shell to be dyed. I usually boil them for up to half an hour. For the ones that I want more intensely colored I leave them to stand a little longer in the dye.
I prefer the second method.
What kind of look you can expect
Shortly, expect unexpected.
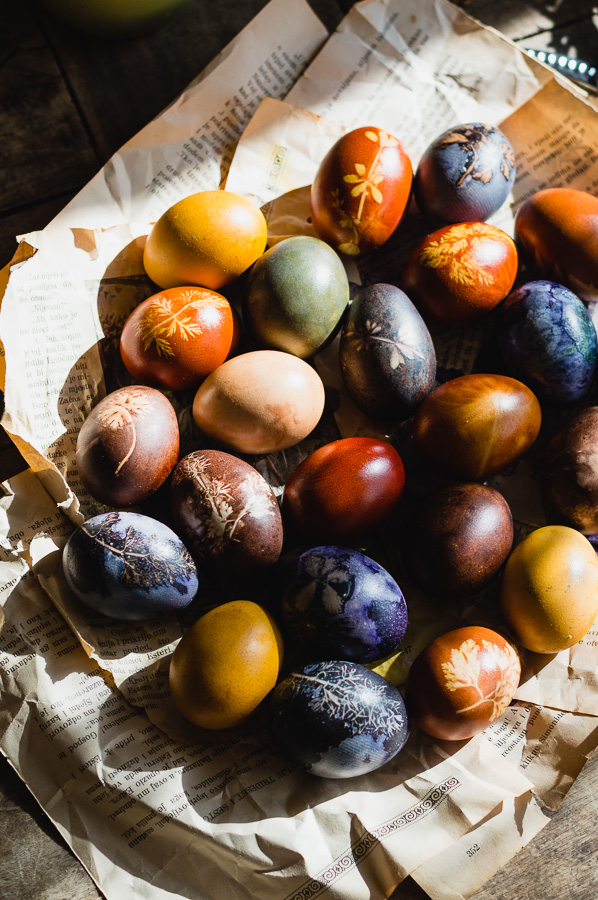
It’s very unlikely that you will get as even and intense colors as you would with artificial egg dyes.
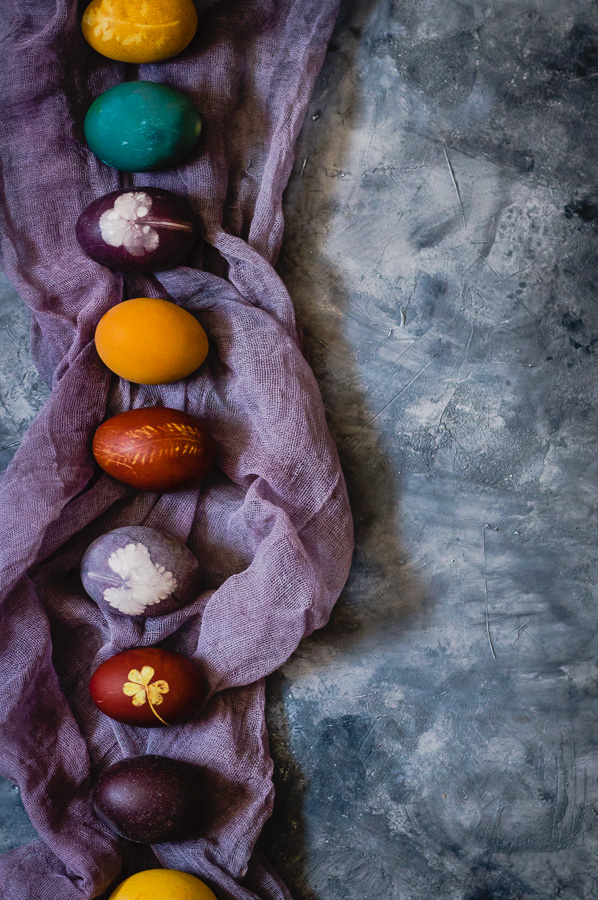
The colors will probably be more pastel and each egg will look unique. They may even look like you’ve colored them with watercolors because they will have freckles, spots, and swirls on their shells that will look SO BEAUTIFUL once they dry!
How to get more even color of naturally dyed Easter eggs
Natural colors can be very unpredictable, that’s their charm. ? You can never be quite sure what color you will get when using natural dyeing materials, whether you are dyeing eggs or fabrics.
The color also depends on what eggs you are using. On the completely white eggs final color will turn out brighter and on darker eggs, the final result will be, logically, somewhat richer and darker.
One of the steps that can allow the natural pigment to be distributed more evenly across the eggshell is removing the plant material (onion, cabbage, tea leaves, etc.) from the cooked dye. In addition, if you dye the eggs in nylon socks or gauze, there is a possibility that part of the pigment will remain glued to the material, as you can see in my video with eggs that were dyed with hibiscus. I don’t mind it because it gives them a rustic look.
If it bothers you, dye the eggs without nylon socks and herbal pattern.
In addition, you can combine two colors by holding the egg in one dye at one time and then in another.
In the video below, see how I dyed eggs with natural colors, and below the video, there are more detailed instructions on how YOU can do it too!
P.S. If you have kids in the house, they will surely enjoy this little DIY project. ?
Instructions for dyeing Easter eggs naturally
How to prepare the eggs
All eggs should be at room temperature and well cleaned on the outside to allow the dye to be applied to the eggshell as easily as possible. I like to clean them with white vinegar and sometimes 70% alcohol.
If you don’t want any special pattern on the eggs, then you can begin dyeing process immediately after cleaning.
If you want to get a herbal pattern, then you’ll need to collect some fresh herbs like dandelion leaves, clover, parsley, carrot leaves or anything that you think might look nice.
Cut pieces of gauze or old clean stockings so you can wrap them tightly. Lay the plant material on the egg and wrap it with stockings and tie it tightly. In the video you can see how I do it. Once the eggs are cooked, you can remove the stockings while the eggs are still wet. In the video, you can see how I do it!
Now let’s see what we need for dyeing!
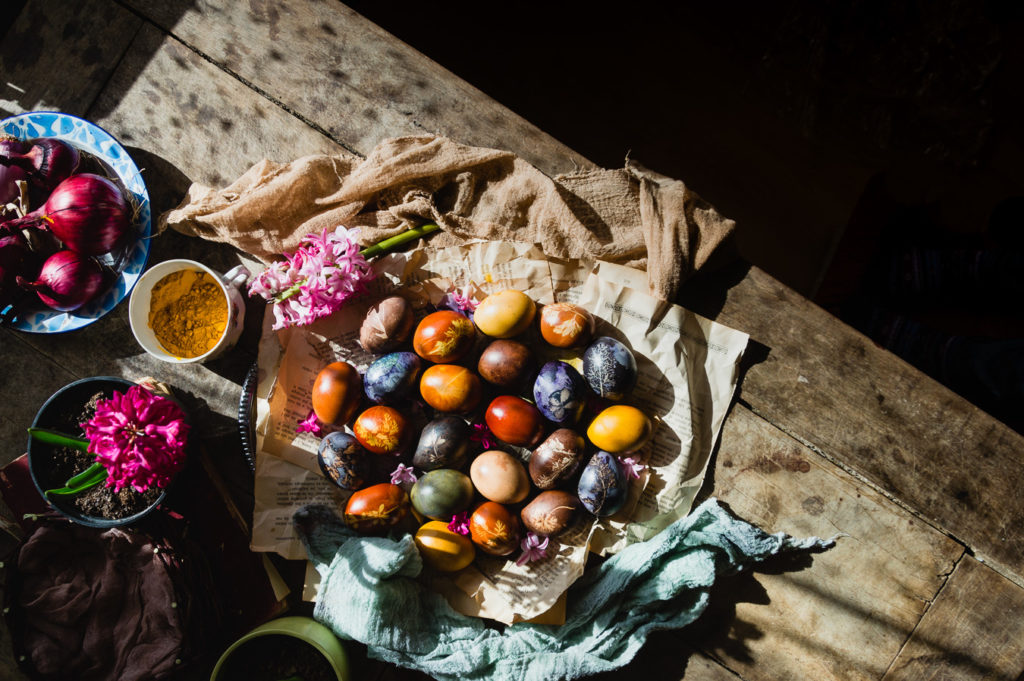
Dyeing Easter eggs with turmeric (light yellow to light orange color)
Ingredients:
2 tablespoons ground turmeric
1 liter of water
2 tablespoons vinegar
Preparation: Put fresh, room temperature eggs in lukewarm water with other ingredients and cook for about 20-30 minutes. If you want the eggs to have a softer yellow color, then remove them from the water and allow them to dry. The one that you want to be more intensely colored leave in turmeric dye until you are satisfied with the intensity of the color. It can be an hour or two or overnight.
Dyeing Easter eggs with red wine (purple to purple-brown color)
Ingredients:
1 liter cheap red wine
Preparation: Put fresh eggs in cold wine and boil for at least 30 minutes over low heat. Once cooked, you can take them out to dry. If you want to get a shiny, glittery effect on the eggshell, i.e., small crystals and stronger color, let them stand overnight in wine.
Dyeing Easter eggs with onion skins (red to brown-orange color)
Ingredients:
1 liter of water
Skins of 10 – 12 red or purple onions
Preparation: Remove the skins from the onions and place them in cold water. Put fresh eggs in water and cook for 20-30 min. For more color intensity, you can also leave them standing for a few hours, although this is not usually required.
Dyeing Easter eggs with hibiscus (blue to dark blue)
Ingredients:
100 g of hibiscus
7 dcl of water
Preparation: I used less water here to get a stronger pigment. Boil the eggs with the hibiscus tea and cook until you reach the desired shade, also for a minimum of 20-30 minutes. You can also leave them to stand longer if you want richer and darker color.
BTW, if you’re looking for recipes for sweet Easter bread, maybe you should try my soft and sweet Croatian Easter bread!
What is your favorite way of decorating eggs for Easter? Do you prefer natural dyeing or some other technique? Write to me what you think here on the blog in the comment section, on Instagram or Facebook. And of course, if you need any advice, I’m here to help!
If you try any of my methods of dyeing Easter eggs, please let me know by tagging me on Instagram @foodandmoodblog.
And happy Easter!
Sources:
Leave a Reply