
Table of Contents
Key Takeaways
- A Christmas tree-shaped cheese board is an easy way to add a touch of holiday cheer while elevating your table’s aesthetics, making it an unforgettable experience for your guests!
- This way of plating food allows you to cater to diverse palates; you can customize it easily to satisfy all tastes.
When it comes to holiday food, few things can match the charm, looks, and versatility of cheese boards. A cheese board is not just a platter of food—it’s an experience if you know what you’re doing. A well-crafted cheese board can easily become a centerpiece of your Christmas gathering, offering something delicious for everyone.
In this post, I’ll guide you through crafting a Christmas tree cheese board that is as delicious as beautiful. Plus, it’s so easy to make and I promise, you’ll enjoy every step of crafting it! From choosing the right ingredients to styling tips, this guide has everything you need to impress your guests. Plus, you don’t need special tools for making this cheese board!
Essential Ingredients and Tools You’ll Need
To capture the Christmas spirit, select seasonal and colorful ingredients, offering different textures.
- Board/Platter – choose a board that complements your holiday theme. A wooden board offers rustic charm, while marble lends sophistication. I chose the biggest board I had on hand because, the bigger the board, the more interesting Christmas charcuterie tree you can arrange (and more people to feed). You’ll also need a few smaller bowls for some jams, sauces, and pickles.
- Meat – choose a combination of salty, cured meats like prosciutto or coppa, salami, and ham or mortadella.
- Cheese – some semi-soft cheese, hard cheese and special ones, like blue cheese or brie would be a great choice for a Christmas-themed platter.
- Accompaniments – carbs like neutral-flavored crackers, bread, fresh and/or dried fruits, some nuts, and spreads. For fresh fruit, choose what’s in season. It’s bizarre for me to see fresh raspberries or blueberries on Christmas cheese platters. I also love to include pickles, some good olives, or cheesy stuffed cherry peppers.
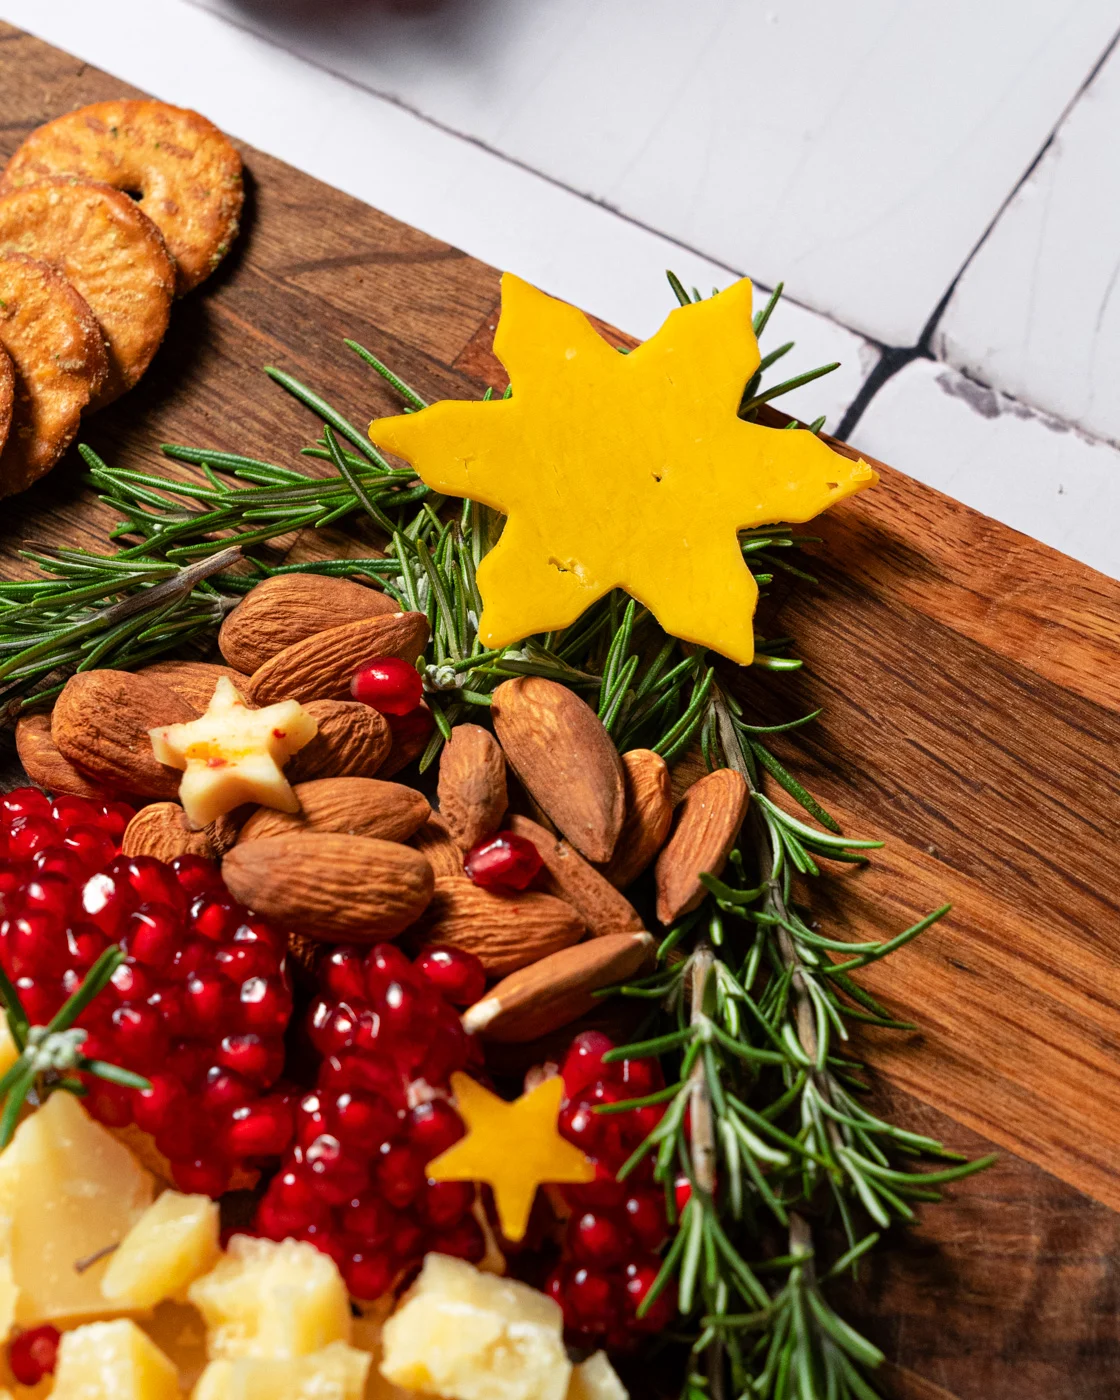
- Decoration – I’ve used fresh rosemary sprigs to create the shape of a Christmas tree and to add a pop of green.
How to Build Your Christmas Tree Cheese Board
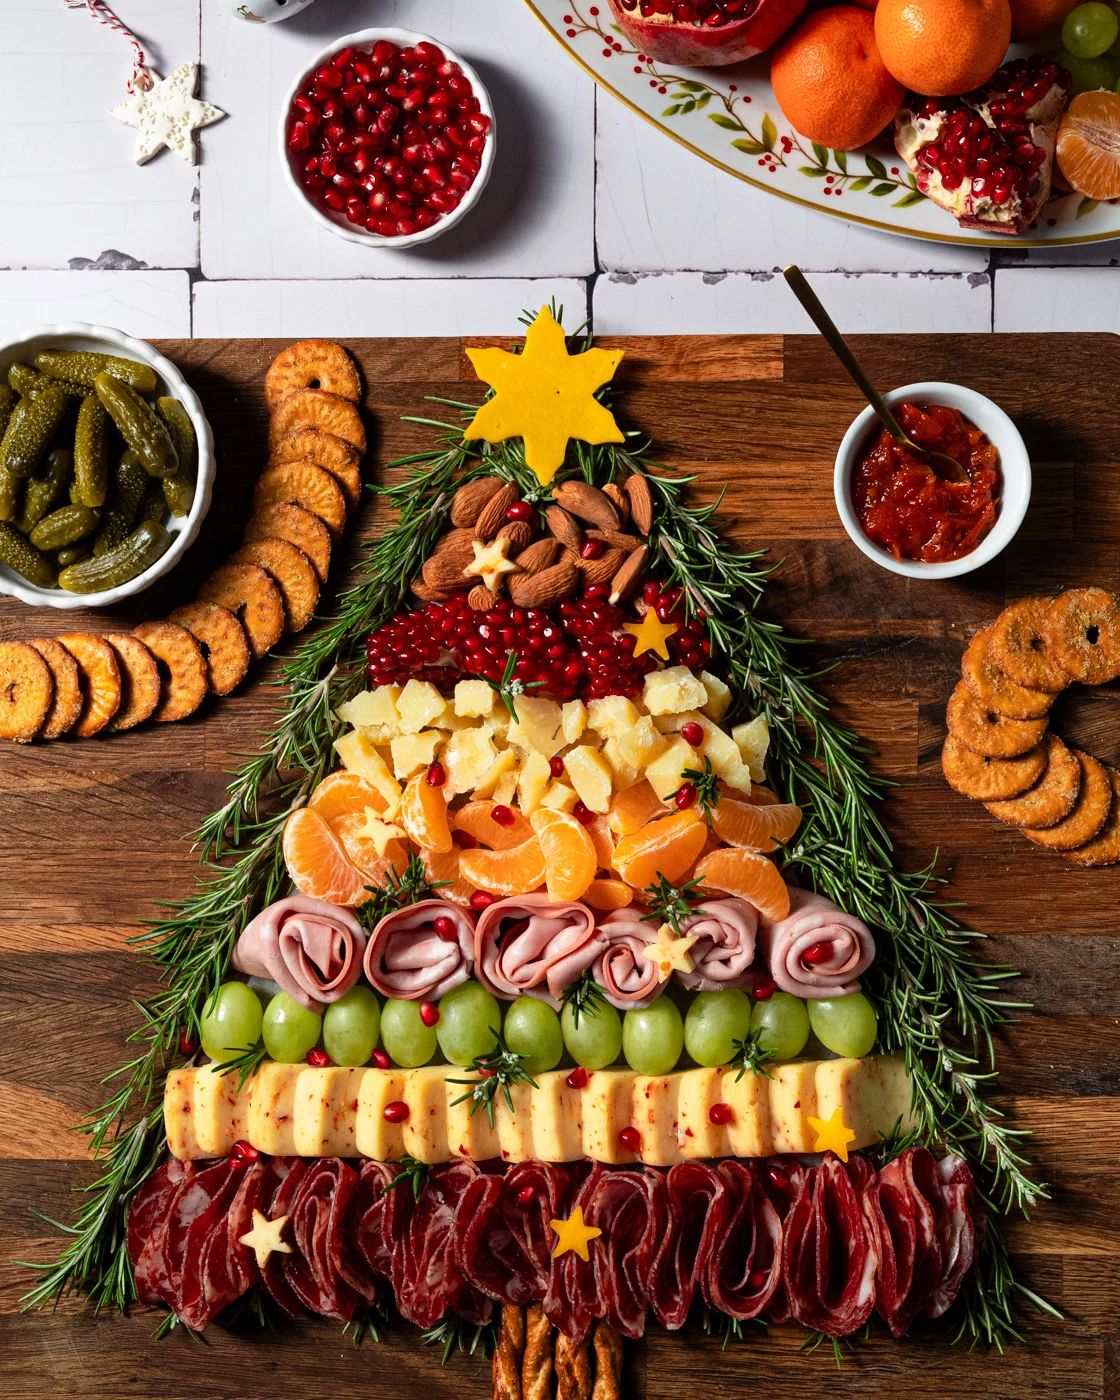
If you want to arrange your Christmas tree cheese board like a pro, you can start by placing a piece of parchment paper cut to match the size and shape of your Christmas tree. This step helps me make a neater tree on my board and acts as a great visual guide! Alternatively, you could just mark the shape of a tree with rosemary sprigs and then arrange all the ingredients inside.
Start from the bottom of the tree arranging your ingredients the way you like. During this process, think about the types of ingredients and colors you will place next to each other. For example, you don’t want to put all different cheeses next to each other because it won’t look that interesting.
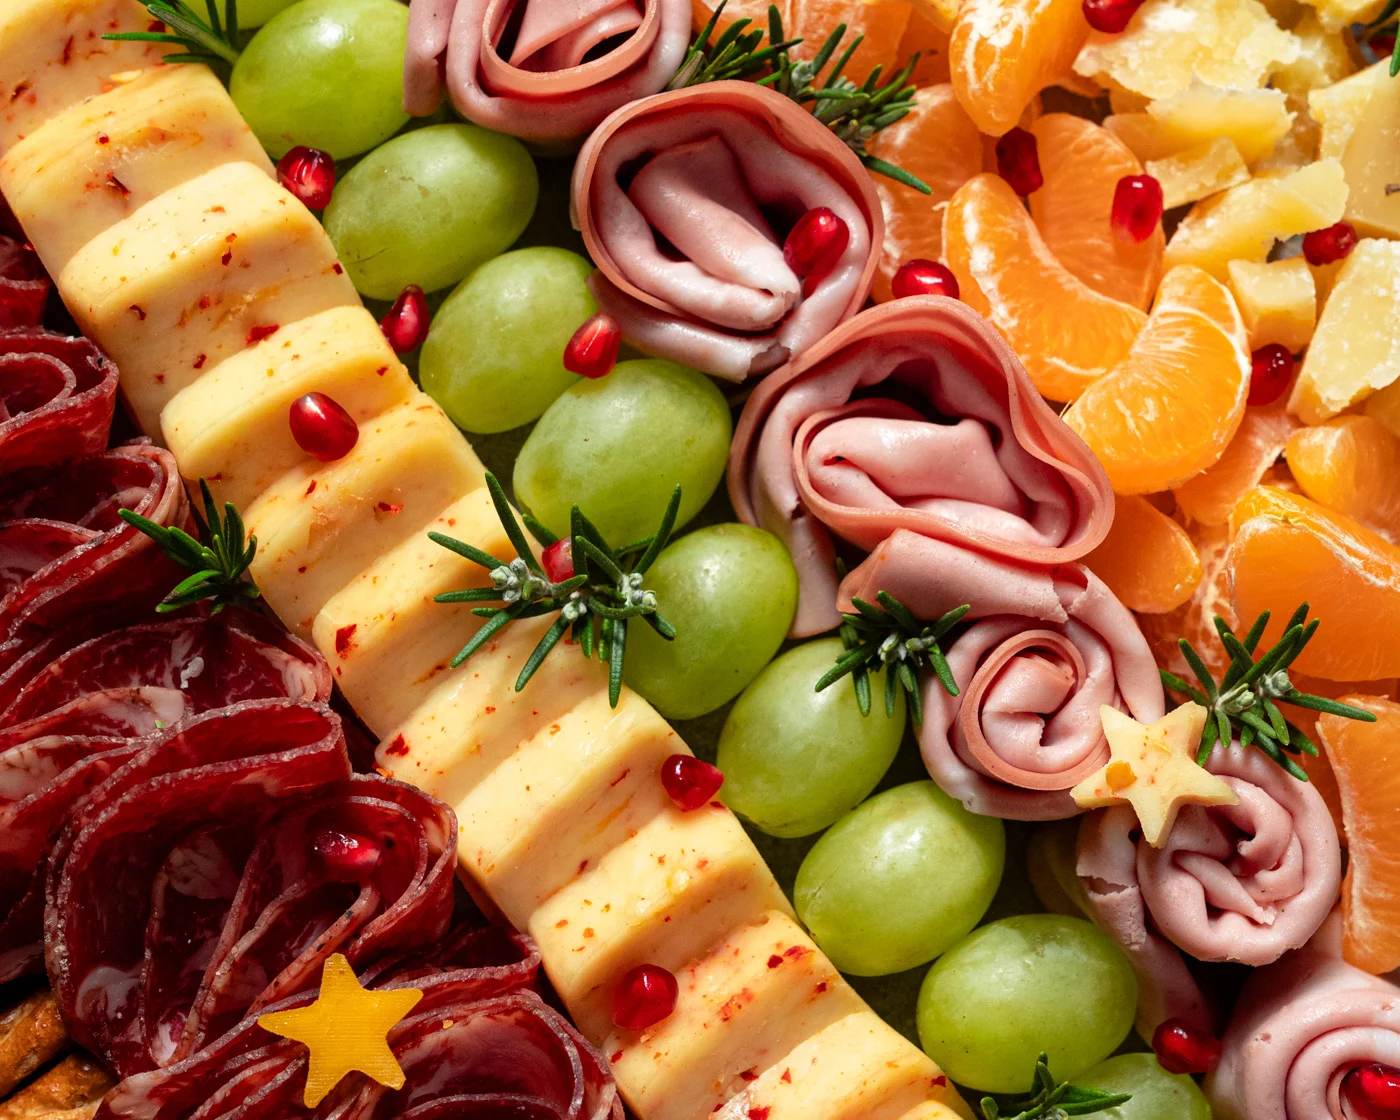
Instead, add one row of cured meats, then one row of cheese, then one row of fresh fruit—you see the pattern here. At the top, place a piece of star-shaped cheese (use your cookie cutter for this).
I had a lot of extra place on my board after arranging my Christmas tree, so, to the sides, I added crackers, lovely homemade tomato jam, and pickles on the side. To make a tree trunk, I’ve used some lovely pretzel sticks.
For more visual interest, I’ve sprinkled some fresh pomegranate seeds and added tiny cheese stars but if you’re low on time, you can skip this step.
Serving and Storing Tips
This cheese board is meant to be served right away after arranging; if guests haven’t arrived yet, wrap the board carefully with plastic wrap until ready to be served.
This Christmas tree cheese board is guaranteed to be the star of your holiday table. Your guests will be impressed, I know that. Merry Christmas!
More Christmas Recipes
- BEST RED MULLED WINE
- HOW TO MAKE YOUR HOME SMELL LIKE CHRISTMAS (NATURALLY)
- EDIBLE HOMEMADE CHRISTMAS GIFTS
- CROATIAN POPPY SEED AND WALNUT ROLL
Christmas Cookies You’ll Love
If you try this recipe, tag @foodandmoodblog on Instagram or leave your comment and rating of this cheese board here on the blog. This means the world to me!
Fuel My Creativity!
Support my work by making a small donation.

Christmas Tree Cheese Board
Equipment
- 1 wooden board (44 x 42cm)
Ingredients
MEATS
- coppa
- pistachio mortadella
- salami
CHEESE
- cheddar cheese
- spicy paprika cheese
FRUITS AND NUTS
- grapes
- clementines
- pomegranate seeds
- almonds
GARNISH
- rosemary (fresh sprigs)
CARBS, SPREADS
- pickles
- tomato jam
- pretzel sticks
- crackers
Instructions
- Choose a large, flat surface to assemble your cheese board. I used a rectangular wooden board and cut a piece of parchment paper into a triangle shape to serve as a visual guide while arranging the ingredients.
- Cut the desired cheeses into slices, wedges, or cubes. Using a cookie cutter cut the star shape from some of your semi-hard cheeses. Set aside.
- Start with the widest part of the "tree" at the bottom. Arrange a row of cured meat in a straight line (or slightly curved one). Layer the cheese row above the first one, and continue with doing this with other ingredients making each row narrower as you move up.
- Place nuts in small clusters for texture and flavor variety. To make a tree trunk, use some crackers or pretzel sticks at the base.
- Finally, finish this Christmas tree cheese board with sprigs of fresh rosemary. At the top, add a star-shaped piece of cheese to finish the look. I had some extra place on my board after arranging my Christmas tree, so, to the sides, I added crackers, lovely homemade tomato jam, and pickles. Serve!
Nutritional information provided is an estimate based on ingredients data and should be used for informational purposes only. Actual nutritional content may vary based on factors such as portion size, preparation methods and ingredients used.
Leave a Reply