Table of Contents

Why Should You Make Your Own Sauerkraut
During reading this post, at some moment you maybe started to think: “Why would anyone nowadays make sauerkraut at home when it can easily be bought at the store?” My motivation for this endeavor was twofold:
- I can season my sauerkraut just the way I want it – I don’t know what is the situation in your country, but in Croatia, in stores, we can buy only sauerkraut seasoned with salt, most of the time. With so many spices and other opportunities for even better flavor, it would be really a shame not to experiment. That’s why I decided to try some new flavor combinations. Also, I find store-bought sauerkraut to be too sour for my taste.
- Learning about the fermentation of food and preserving excess vegetables – preparing veggies and observing what will happen in these wonderful jars, for me, is an amazing experience! For example, sauerkraut won’t have the same taste on the 7th and on the 14th day of fermentation. Moreover, it is more likely that the taste will change completely. I don’t know about you, but this is absolutely fascinating to me. Also, because I constantly try different recipes, I often find myself in a situation where I don’t have enough time to use up all the veggies before they spoil. I hate throwing away food and lacto-fermentation is a great way to prolong its life.
How Does Lacto-Fermentation Work
Lacto-fermentation of food is a process in which the Lactobacillus bacteria convert naturally occurring carbohydrates from food (in this case vegetables), into lactic acid.
During this process, carbon dioxide is also released, especially in those first few days of fermenting. In this process, Lactobacillus can be considered as “good bacteria”, which, if we provide them with desirable conditions, will sweep away those “bad bacteria” and make our food very tasty and funky.
What you need to pay attention to is that these types of bacteria can only survive in an anaerobic environment (an environment without the presence of oxygen). That’s why you need to pay special attention that your cabbage stays under the brine the whole time during the process of fermentation. Otherwise, various molds, fungi, and other bacteria that we consider undesirable for us can develop. This will spoil the cabbage and we will not be able to consume it.
Can Salt Harm Good Bacteria?
It won’t. As a matter of fact, in the initial stage of fermentation, the salt will prevent the development of unwanted bacteria so that Lactobacillus can do its job. Salt also helps our vegetables to stay crispy, along with spices it develops flavor and controls the speed of fermentation, which is especially important during the warmer times of the year.
You may be wondering which salt is best to use for lacto-fermentation? Someone says you should use Himalayan, not table salt, and someone that you should use sea salt. The authors of the great book “The Art of Fermentation” Sandor Ellix Katz and Michael Pollan say that it doesn’t really matter what salt you use. I use sea salt most of the time in my cooking, so I used it in this recipe as well.
Ingredients And Equipment Needed
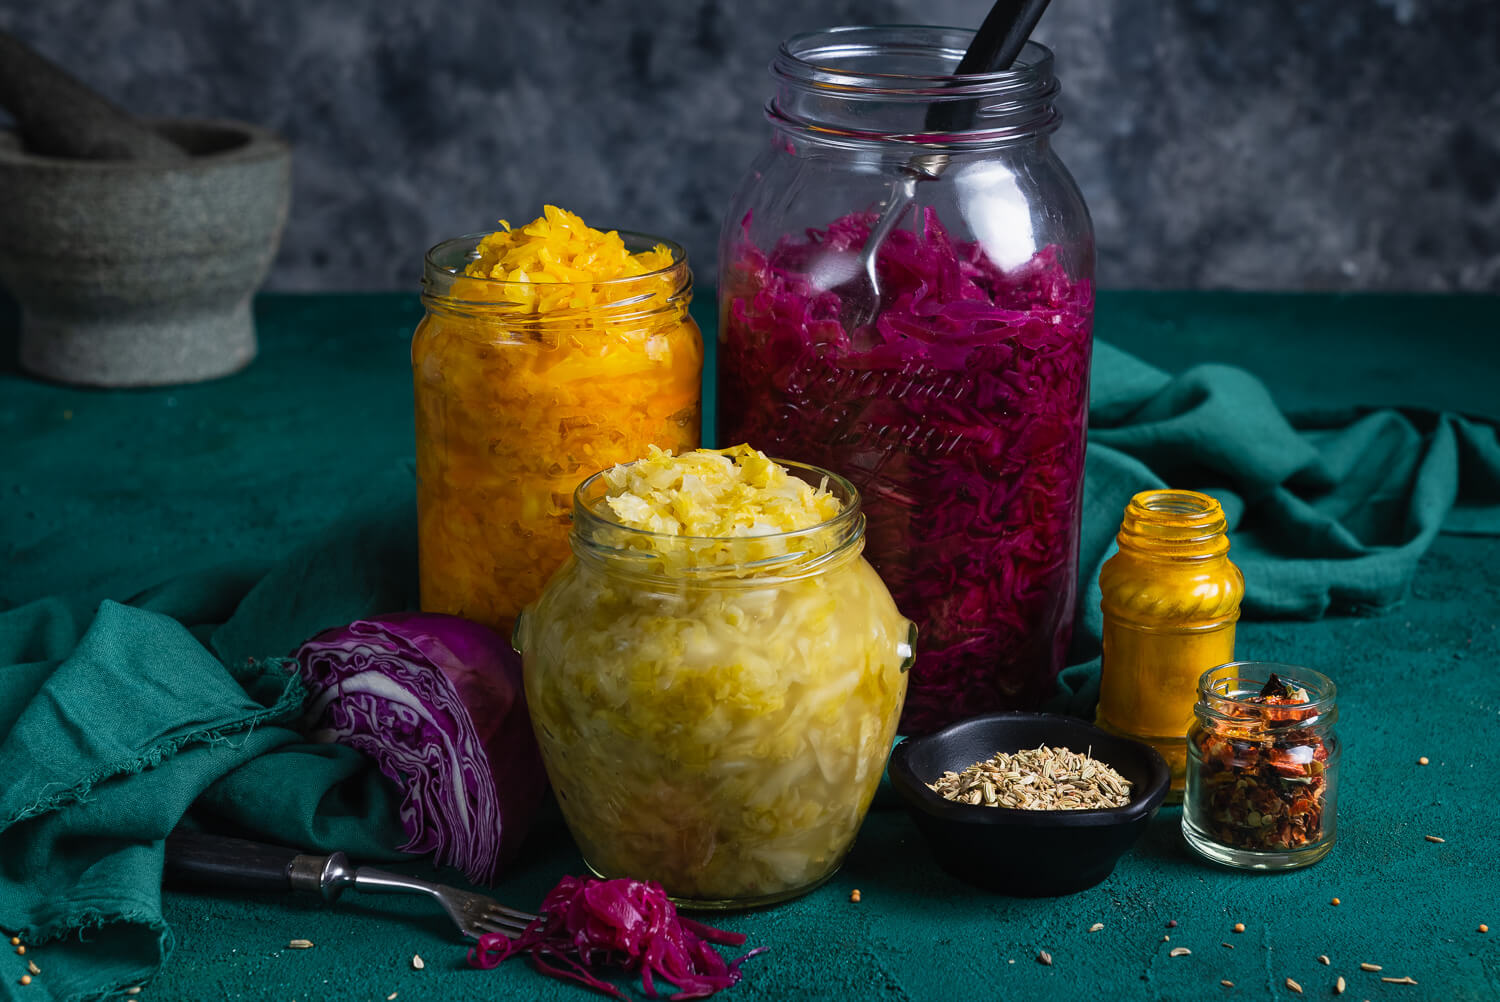
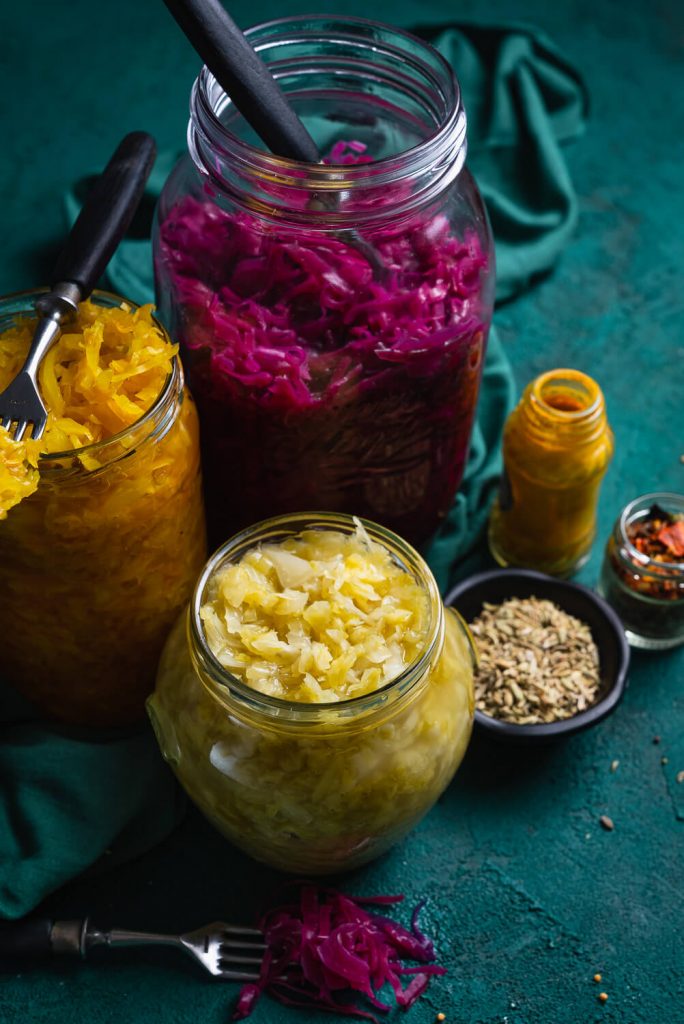
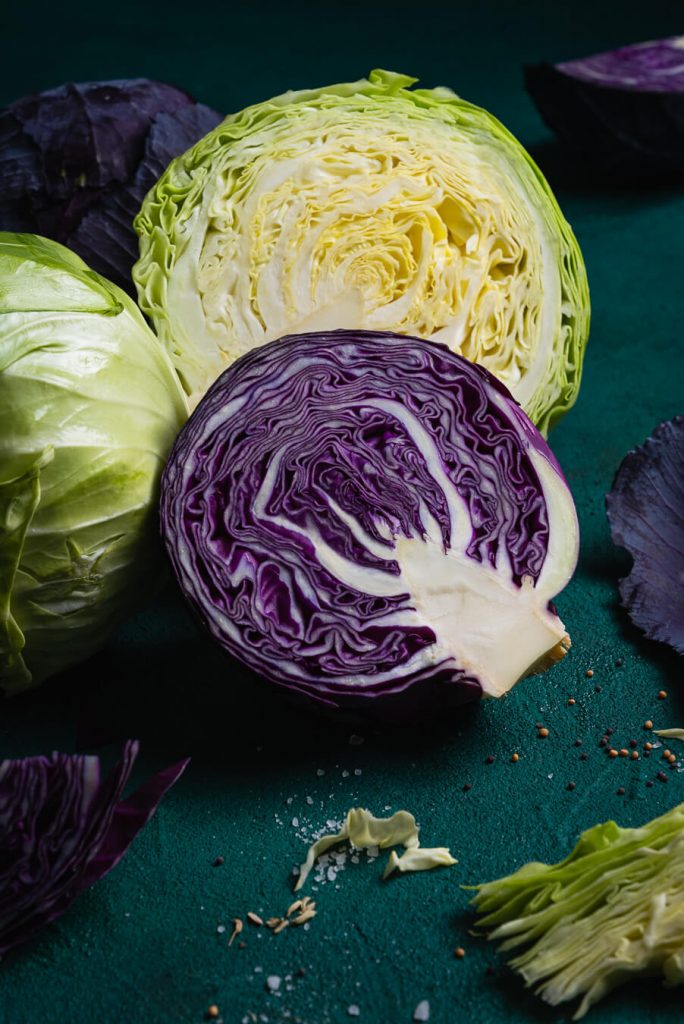
- Vegetables – With the process of lacto-fermentation we can preserve almost any veggies that come to our mind. Since I decided to make homemade sauerkraut, I bought two cabbage varieties: green and red cabbage. You can use any type of cabbage you prefer. And you don’t need to stop there; add shredded carrots, parsley, celery root, or even beetroot.
- Salt – I prefer to use fine sea salt.
- Clean jars – Wash them thoroughly with hot water and detergent. If you want, you can also sterilize them at 100°C (212°F).
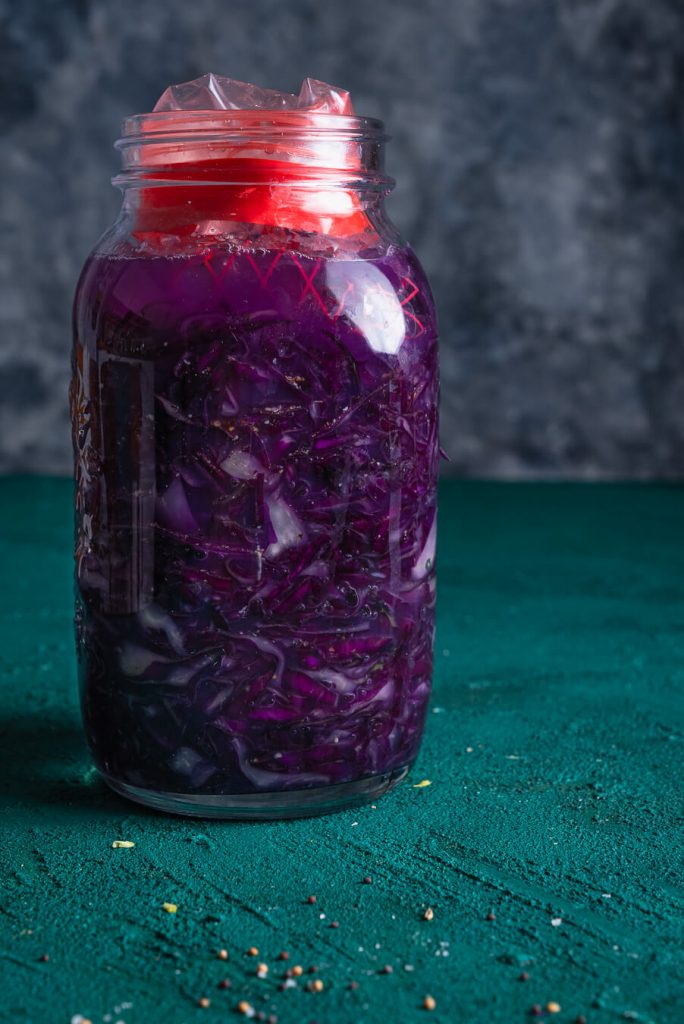
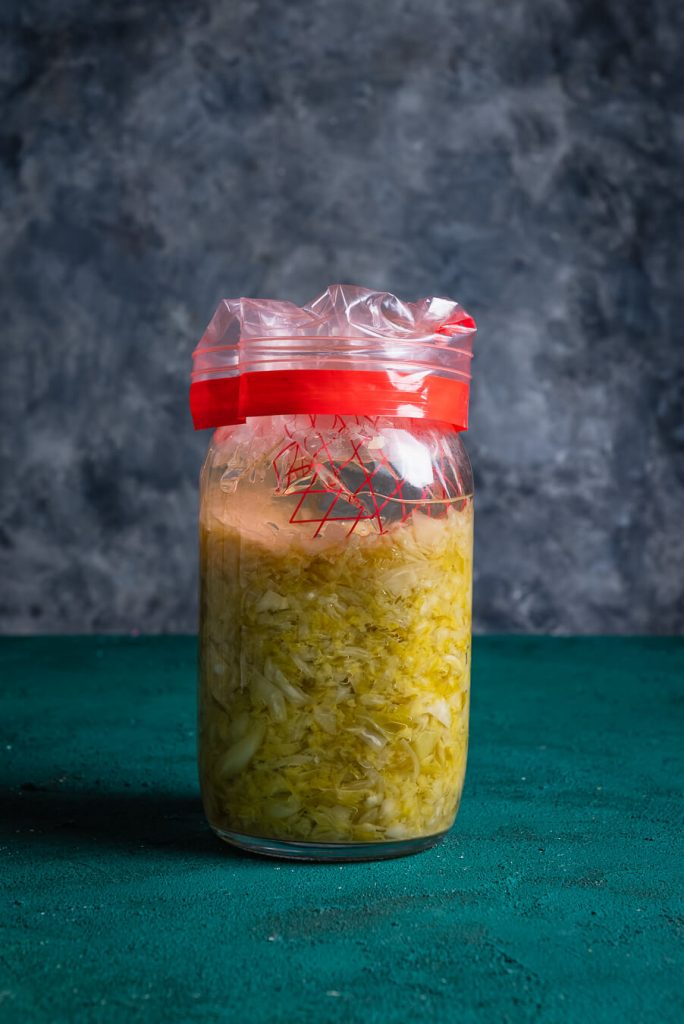
- Weights – The key to successful lacto-fermentation is to ensure that the vegetables remain submerged in water and salt. This can be done in different ways – you can put a few extra cabbage leaves and press them with a clean rock or you can use store-bought weights. I like to use clean plastic zip bags (make sure they don’t leak) filled with tap water – they do their job pretty good!
- Time – waiting is definitely the hardest part. After a few days, the cabbage will already start to change its appearance and taste. Expect a lot of CO2 in the first week. Keep your jars with veggies on the surface that can easily be cleaned. If you don’t like very sour sauerkraut, you can consume it after a few days. However, I recommend you to be patient and wait at least 10-14 days, or preferably longer, for the flavors to further develop and deepen.
- Vessels – traditionally, vegetables were most often fermented in clay vessels. Some people use plastic today, but for such a small amount of sauerkraut, glass jars proved to be the most practical solution for me. The wider the opening of the jar, the better. While you wait for the Lactobacillus to do their job, you don’t need to close the jar hermetically with a lid. Also, always leave at least 6-7 cm to the top of the jar to get room for your weights.
The Best Temperature For Lacto-Fermentation
The length of fermentation will also depend a lot on the room temperature. During the summer, it will certainly take less time for veggies to ferment in comparison to the cold, winter months. Generally, the best temperature for lacto-fermentation is between 16 and 24°C (60 – 75°F).
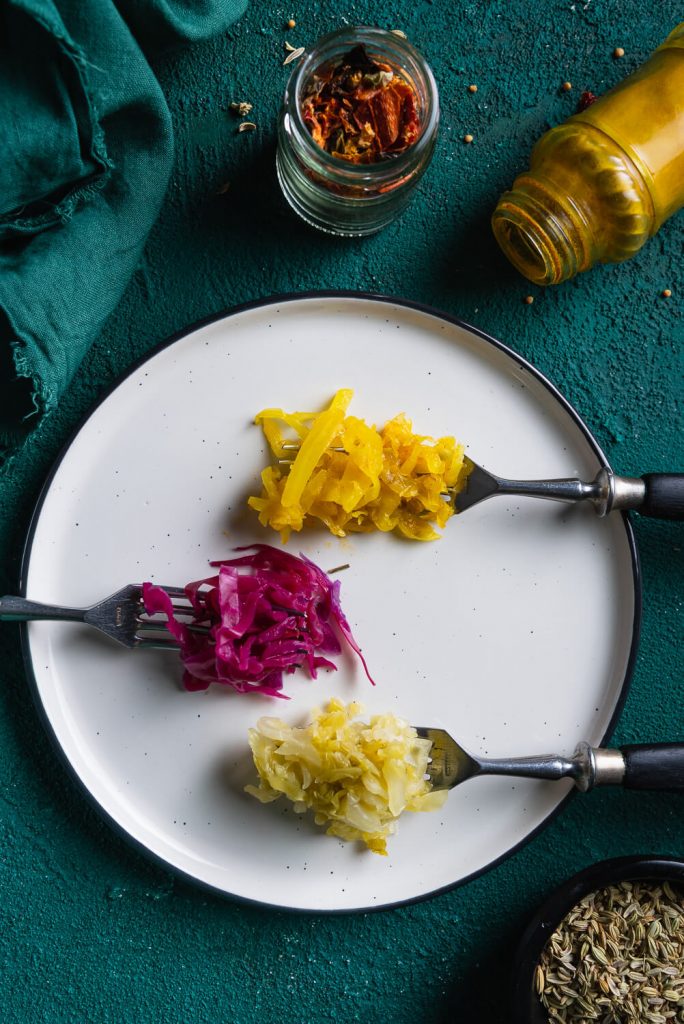
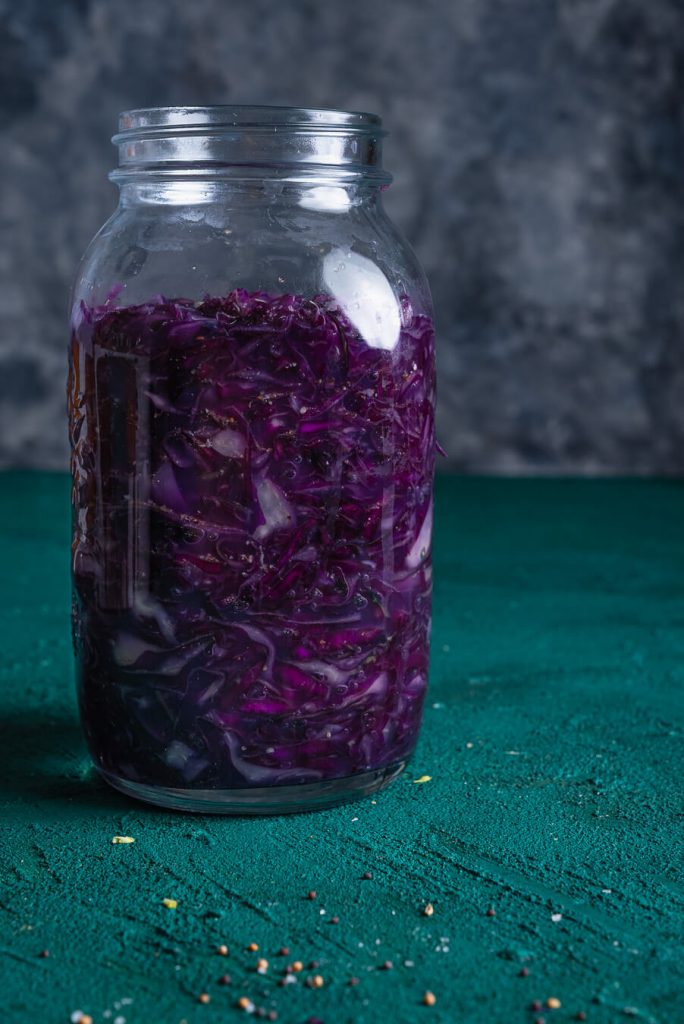
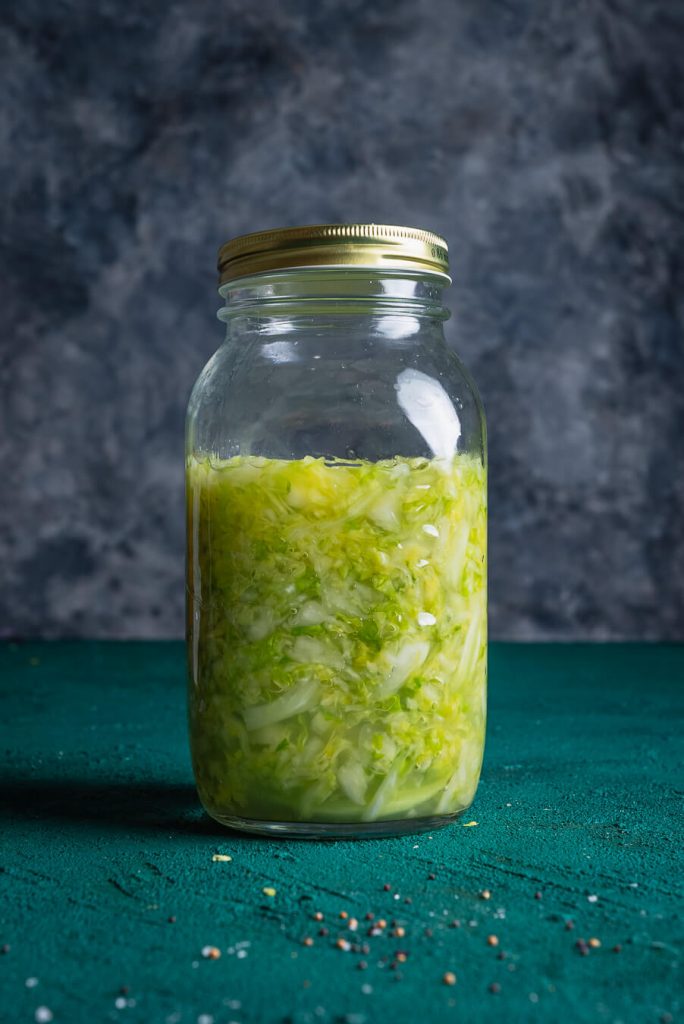
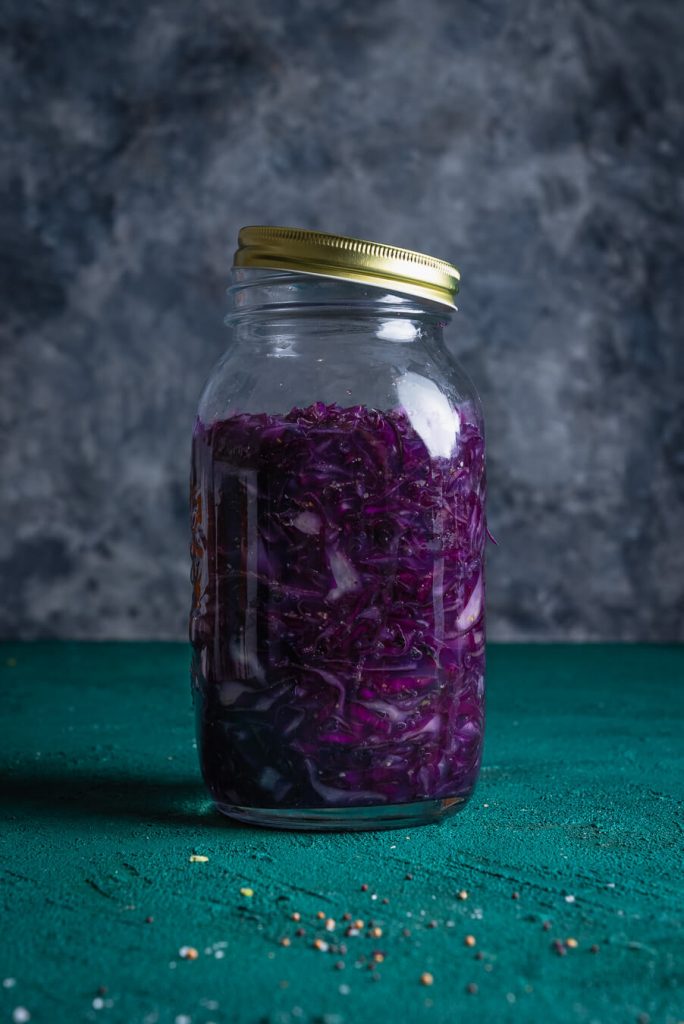
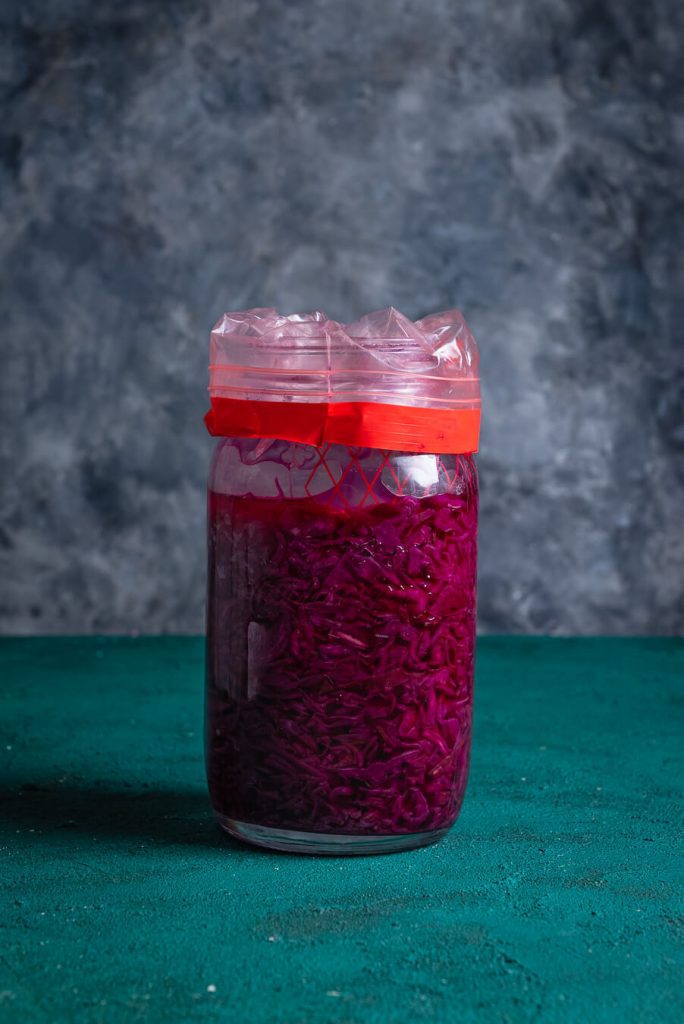
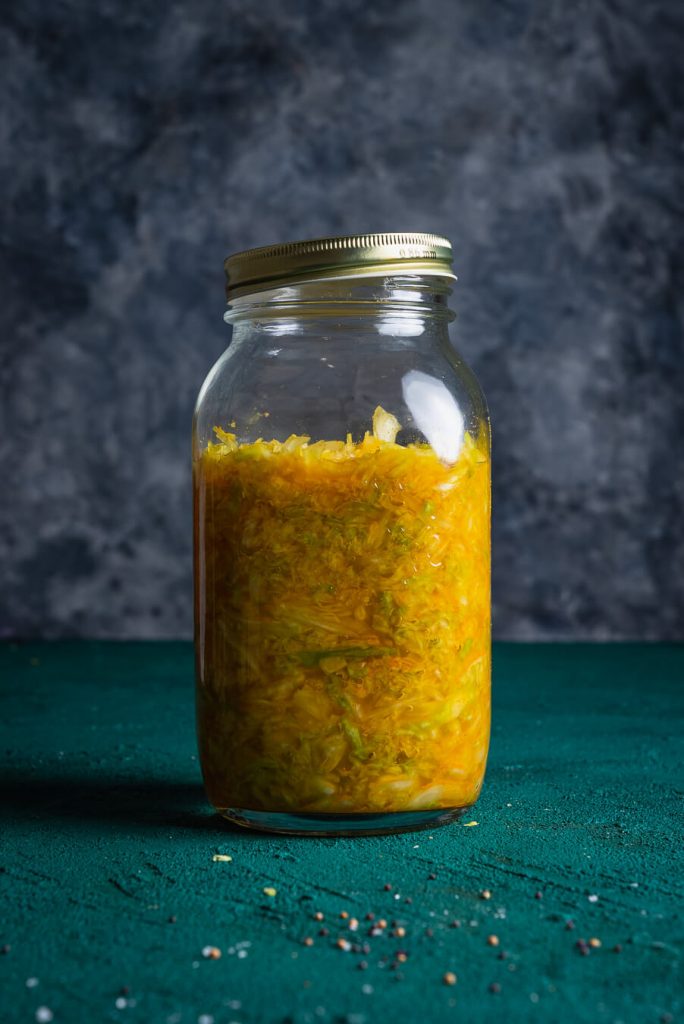
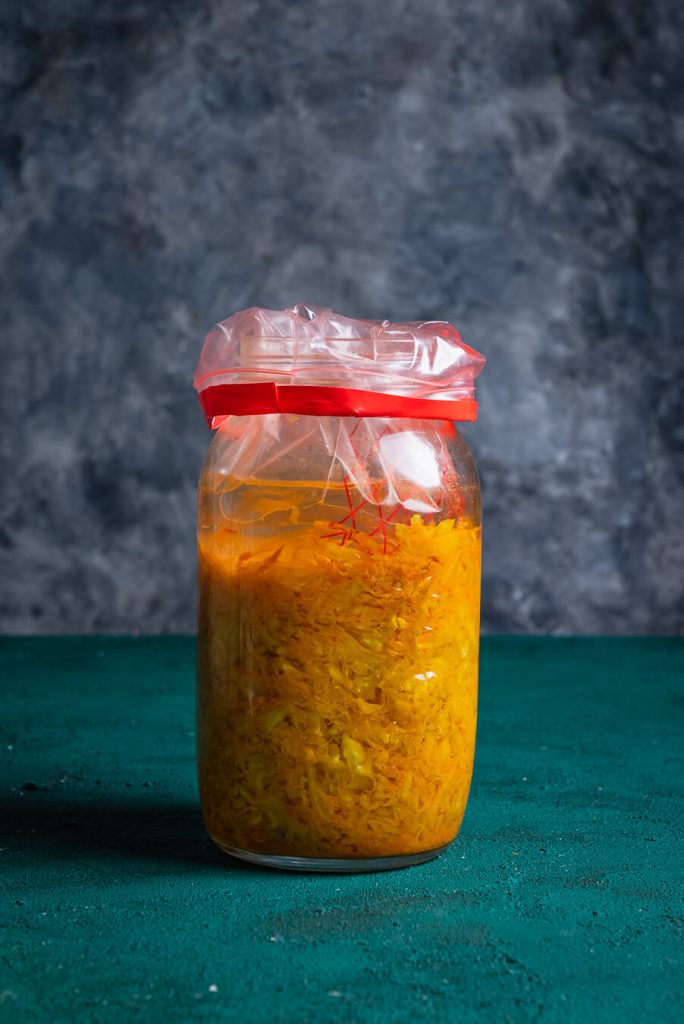
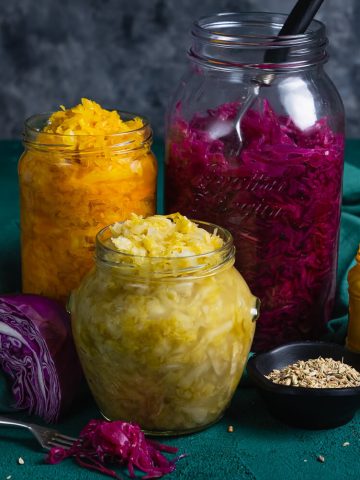
In this post, I will show you 3 varieties of homemade sauerkraut that I made. In the images below you can see what cabbage looked like on the 1st and on the 14th day of fermentation.
7 Sauerkraut Recipe Ideas
Although I like to eat sauerkraut mostly during fall and winter instead of salad made from fresh veggies, it can easily become a part of a whole new dish or serve us as a great side dish! As our body looks for different kinds of foods during the cold months, you cannot go wrong with combining homemade sauerkraut with cured meat, different types of sausages, or bacon.
For example, I bought some delicious sausages in the local butcher shop and combined them with red sauerkraut, ajvar, and pickles in hot dog buns, and boy, what a great treat that was!

Here are some ideas for using sauerkraut in different recipes:
- Sauteed sauerkraut (my family’s favorite)
- Istrian jota
- Potato and sauerkraut casserole
- Grilled cheese and sauerkraut sandwich
- Warm turkey salad
- Ukrainian sauerkraut soup (kapustnyak)
More recipes for preserves to try
- OVEN-ROASTED PLUM JAM (NO ADDED SUGAR)
- NO PECTIN FRESH APRICOT JAM
- HOMEMADE KETCHUP FROM FRESH TOMATOES
If you try any of these homemade sauerkraut recipes, be sure to tag me on Instagram or send me photos of it! If you have any questions, feel free to pop in my DMs on social media or send me an e-mail! For more video recipes, be sure to subscribe to my YouTube channel.
Sources:
https://www.irishtimes.com/life-and-style/the-great-big-fridge-debate-1.1152534
https://nova-akropola.com/kulture-i-civilizacije/tragom-proslosti/james-cook/
Fuel My Creativity!
Support my work by making a small donation.
Homemade Sauerkraut Recipe – 3 Ways
Ingredients
Basic sauerkraut
- 1 kg green cabbage (finely grated and chopped)
- 25 g sea salt
Hot & spicy sauerkraut
- 1 kg green cabbage (finely grated and chopped)
- 25 g sea salt
- 1 teaspoon turmeric powder
- ½ teaspoon hot paprika powder
- ½ teaspoon ginger powder
- ½ teaspoon fennel seed powder
Funky red cabbage sauerkraut
- 1 kg red cabbage (finely grated and chopped)
- 25 g sea salt
- 1 clove garlic (minced)
- ½ teaspoon ground black pepper
- ½ teaspoon ground coriander seeds
- ½ teaspoon ground mustard seeds
Instructions
- Remove the damaged, outer leaves of the cabbage, wash the cabbage head, and drain from water. Cut it into quarters, then finely grate (I recommend using a mandolin).
- Transfer the shredded cabbage to a large bowl, add salt, and start massaging the cabbage with your hands to let it release as much water as possible.
- After 10 min, the cabbage should have already released a lot of water, softened, and shrunken in size a lot. If you are making one of the versions with spices, now you can add your spices and massage it for an additional 2-3 minutes. Transfer the sauerkraut mixture to clean, dry jars so that you leave at least 6-7 cm to the opening. Add the rest of the brine so that all cabbage is covered in it.
- Take a clean plastic bag (I'm using a zip bag) prefilled with some tap water and carefully place it as a weight in a jar. All cabbage needs to be immersed in the brine. It's not necessary to close the jar with a lid.
- Leave it in a darker place, at a temperature between 16-24 Celsius (60-75 Fahrenheit). Every once in a while check how the fermentation is making progress. Sauerkraut is ready for consumption when you're happy with how it tastes.
- Transfer the sauerkraut to the fridge to slow down the fermentation.
Notes
- Depending on the type of cabbage, the time of the year when it was harvested, and its freshness, there is a possibility that during the massaging of cabbage with salt it may not release enough liquid. It rarely happened to me, but it is possible. Don’t worry about it: you can dissolve some salt in additional water and then add it to a jar. However, it’s important to maintain a good ratio of salt and water. Follow this formula: (water in grams) x 2.5/100. For example, if you need 200 g of water, multiply 200 by 2.5 and divide by 100 and the result will be 5 g.
- Make a note of the date when fermentation started. The easiest way to do this is to write it on a sticker and put it on the jars.
Nutrition
Nutritional information provided is an estimate based on ingredients data and should be used for informational purposes only. Actual nutritional content may vary based on factors such as portion size, preparation methods and ingredients used.
Leave a Reply